Constructing a 3D model is an inexpensive way to fully understand the form and function of a house before it’s built. It will be much easier to correct oversights and omissions during this phase of the design process. This fairly simple process makes use of hard-to-read flat plans to create a house in miniature.
Supply List:
- 3 or 4 sheets of foam core board, available at any office or craft store.
- 2 sets of architectural house plans at ¼” = 1’ scale.
- Glue stick
- Razor knife
- Clear packing tape
Step One—Cut Out Plans
Think of paper dolls, or sewing patterns. Carefully cut out each floor plan and elevation (side view) plan. There should be 4 separate elevation plans.
Step Two—Glue to Foam Core and Trim
After you glue the plans to the foam core, trim carefully around the edges using the razor knife. Be careful. Those things are sharp.
Step Three—Assemble
This is Where it Gets Tricky
The most simple way to build the model home is to set the walls (elevations) in place using only the first floor plan. You won’t get the full sense of the second floor layout, but it’s easier.
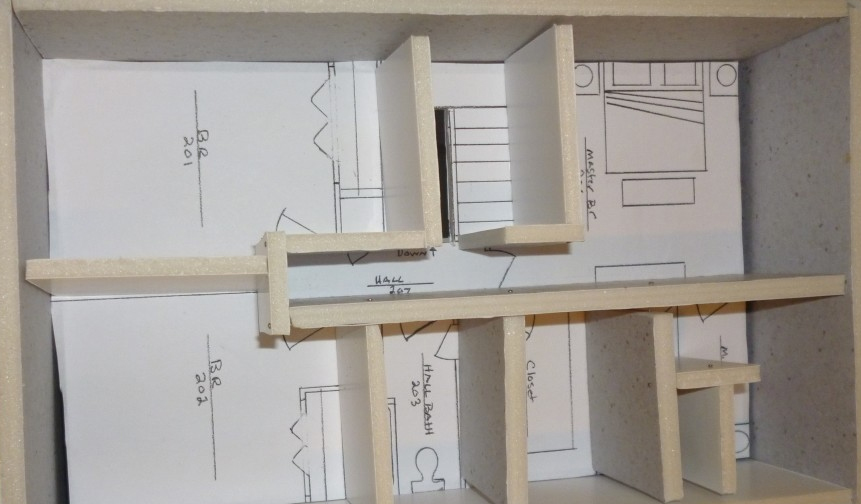
Up for the challenge? Okay. It should show on the plan the first floor ceiling height. If, for example, the plan calls for 9’ ceilings, then cut the foam core in strips 2 ¼” wide—that’s the scaled wall height. Then cut it in lengths equal to the interior walls on the floor plans. Use the packing tape to hold them in place. Don’t skimp on the tape.
Next, set the second floor plan on top of the interior walls
Then, tape the exterior walls (elevations) into place.
Finally, the only thing missing is the roof. Using the same techniques cut the roofs from the side elevations. Tape them to form a ridge at the peak..

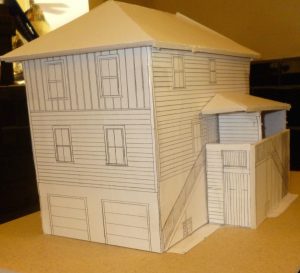
A Model Home
Now you can see and handle an accurate 3D ¼” scale model of your future home. Pick it up and turn it around. Does anything surprise you? It will be much easier to correct during pre-construction planning.